Labels

Thursday, 31 January 2019

Owl in Copper


Hello and wewlcome to my blog  :)  I have a stylish and fun card to share today, another of my CB samples from December's shows.  I have used stamps from the Wise Owl and Fly Away With Me sets; Copper Soft Form Relief Paste, copper embossing powder, copper artists pen, and gold gilding wax.


 On a piece of black card I stamped several different sizes of feathers with Versafine ink and embossed them in copper.  I then used a copper pen around the edges.  


I created some embellishments using the Soft Form paste, I spread it over the owl and feather stamps and left it to dry overnight.  Meanwhile I stamped and embossed the quote onto a spare piece of black card in copper.  I then tore the card around the quote and added gold gilding wax to the torn edges.  


When the paste was set and dry I peeled it off the stamps.  All the detail from the stamps was now revealed in 3D.  I added some gilding wax to all the embellishments to highlight the details.  


I attached the background panel to a white base card then added all the embellishments.  I positioned one of the feathers with the end of it's quill next to the last word of the quote, as if it had just finished writing it.  


I loved creating this card using just three colours, it is both stylish and striking.  I think it is suitable for any recipient, and many occasions.
Thank you for popping in today, I hope you've enjoyed reading this post - feel free to leave me a comment - and drop by again soon  :) 

Thursday, 17 January 2019

Golden Dawn


Hello and welcome to my blog  :)  I have a very cheerful card to share with you today featuring some of the beautiful bird stamps from December's tv shows.  I have used images from the Dawn Chorus, Live Out Loud and Let Your Heart Sing sets; Distress Oxide inks, Versamark ink, gold EP, gold pen, and a couple of stencils from my stash.  


I decided to create a DL card, so on a piece of CB drawing cartridge I created some hills with a mask using green DO ink, then moved the stencil and repeated the process using more ink to make the hills darker so that they appear in the foreground.  I used another stencil to create a sunburst with three colours of DOs. 


I stamped the Dawn Chorus collage image along the bottom of the panel using Versafine ink and embossed it in gold.  I did the same with two images of birds in grasses, and I wanted both images to be seen clearly so I stamped them above the first image to fit them in.   This made one of the images appear to be floating, so I decided to 'extend' the stalks of grass.  Using a very fine brush with glycerine I painted an extension of the grass and embossed it in gold as before.  


I then stamped and embossed the poem at the top of the panel and added gold pen around the edges.  I then matted the panel onto black card and set it aside.  


I took a white base card and stamped several worker images around the edges, using a DO ink, then attached the focal panel.


 I think this is such a colourful, cheerful card that it would bring a smile to the face of any recipient.  It is suitable for lots of occasions and most agegroups.  
Thank you for dropping in today, I hope you've enjoyed this post, and that you'll come back soon  :)

Sunday, 6 January 2019

Butterfly Ball


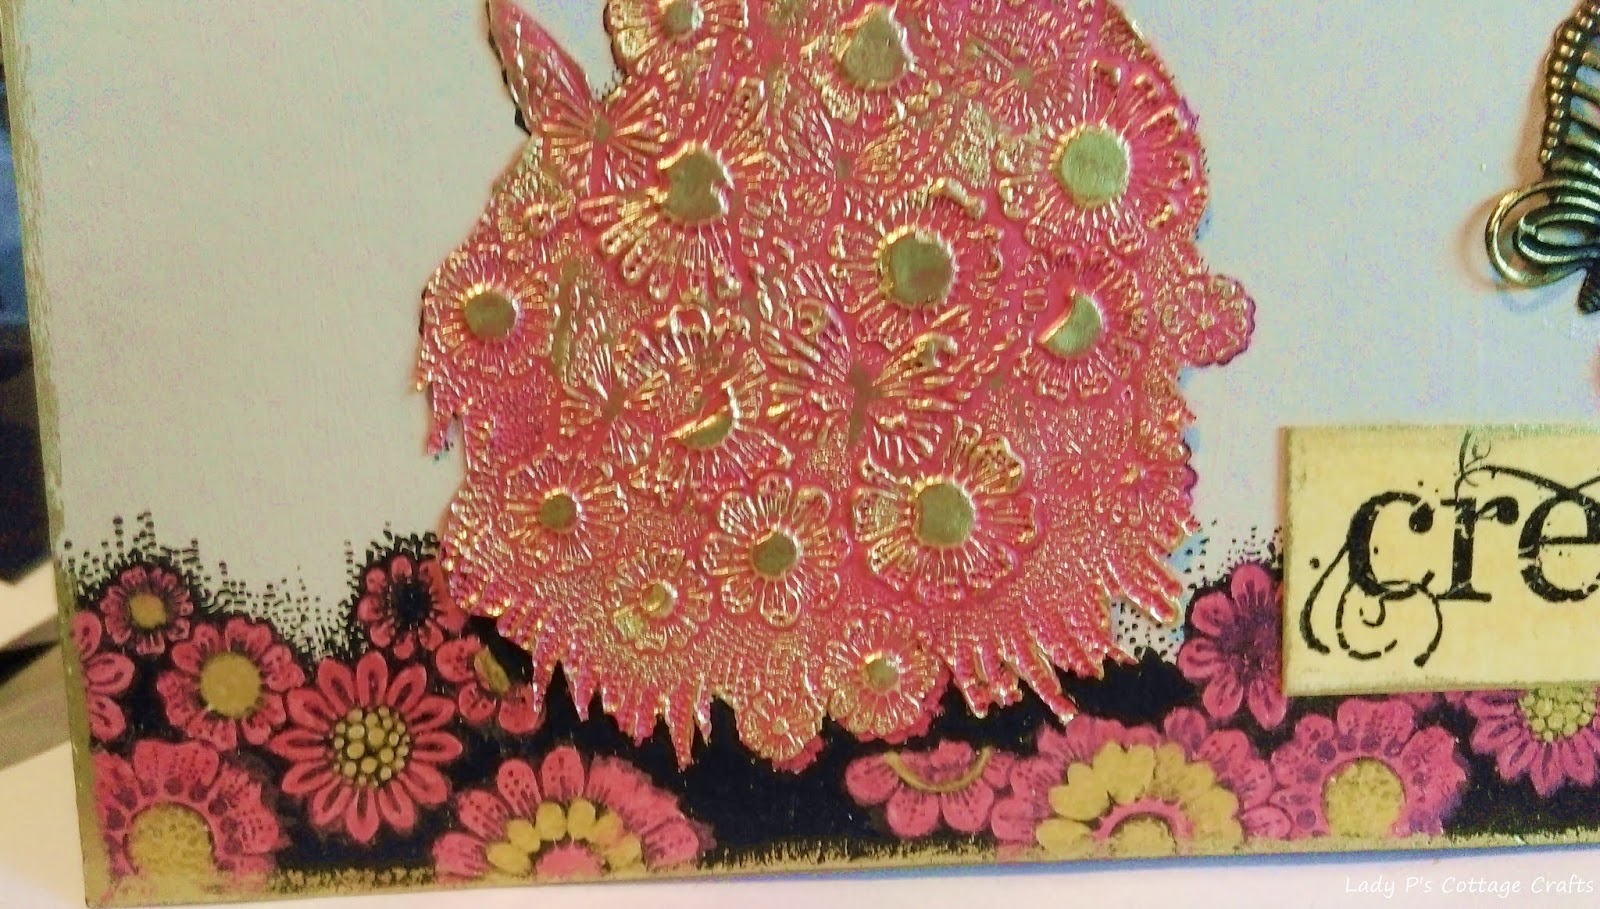
Hi there and welcome to my blog  :)  I have a mixed media canvas to share with you today.   As you may know if you've visited my blog before I love creating mixed media projects as well as home decor projects, and I enjoy mixing the two together.  This canvas was one of my samples for the Chocolate Baroque tv shows.

I have used stamps from the Butterfly Dress, the Floral Edges and Artistic Affirmations sets; Little Birdy chalk paint, Aztec Metallic paints, gold guilding wax, Soft Form Relief Paste - red and black; black Gesso, black Versafine ink, gold pen, and a metal embellishment from my stash.  


I painted the canvas with one of the chalk paints, then stamped and embossed the Butterfly Dress image in black ink with clear EP. 


I then masked the image with masking tissue, as you can see I've used this mask before!  


I placed the palace stencil across the canvas and the top half of the girl image.  I then applied black Soft Form paste through the stencil.  I took some red Soft Form paste and spread it over the floral part of the Butterfly Dress stamp and the girl's hair, then left both the canvas and the stamp to dry overnight.  When dry  I peeled the red paste from the stamp and rubbed a little gilding wax over it to enhance the details.  I also added gilding wax to the black paste on the canvas.


I took a metal butterfly from my stash and added gilding wax.


I stamped the Floral Edge along the bottom edge of the canvas in black Versafine and painted the flowers in red and gold metalic paints.   
I then removed the mask from the image and attached the paste hair and skirt to it.


Using a gold metalic paint I painted a large golden sun in the top center of the canvas.  I then stamped the Leafy Edges image in black along the top edge of the canvas and added gilding wax to the outer edges of the canvas.   


I took some cream card, stamped some words in black and embossed them with clear powder.  I cut each word into a seperate label and edged them with gilding wax before attaching them to the canvas with 3D glue gel.  I then attached the butterfly to complete the design.


I was really pleased with this sample.  I love the colours and textures of the mixed media, and the beautiful stamps speak for themselves.  It was a lot of fun creating this piece, using lots of techniques and lots of messy crafting!
Thank you for dropping in today, I hope you've enjoyed reading this post and that you'll visit again soon  :)

Saturday, 5 January 2019

Golden Song


Hi and welcome to my blog  :)  Today I'm sharing one of my samples from the December Chocolate Baroque tv shows, featuring stamps from the Sing Your Song and Live Out Loud sets; Red Soft Form Paste, red Versafine ink, clear EP, gold pen and gold gilding wax.


I spread the Soft Form paste over the large negative image from the Live Out Loud set and left it to dry overnight.  When dry I peeled it from the stamp and rubbed a little gold gilding wax over it to highlight some of the detail.  I then coloured a piece of paper, a little bigger than the panel, with a gold pen and attached the paste panel to it, then matted it onto black card.


 I took a white base card and stamped a bird in a tree image onto it in red ink, and embossed it with clear EP.  I did the same with a sentiment, then added some gold pen to the images. 


I attached the focal panel to the card with 3D foam pads.


This design is simple and contemporary, which is quite unusual for me!  But I love it, and it's a very versatile card, for any occasion and any recipient, and it could be created in any colour.
Thank you for dropping in today, I hope you've enjoyed this post and that you'll come back soon  :)

Imagine That!


Hello and welcome to my blog  :)  I hope you've had a great Christmas and New Year.  I have a tag to share with you today, featuring stamps from the Sing Your Song, Fly Away With Me and Words of Inspiration sets; Blue Lagoon Versafine ink, Versamark ink, clear and copper EP, Distress Oxide inks, copper sparkle EP, gold glitter texture paste, a gold and a copper pen and a die cut from my stash.


I took a greyboard tag and painted a coat of white gesso onto it.  When dry I blended DOs over it then used one of the colours to stamp the tail of the swirly bird image from the Fly Away With Me set.  


I edged the tag with Versamark ink and embossed with copper sparkle EP.  I then used the CB Useful Leaves stencil and applied gold glitter texture paste through it.  I wanted to create a 'part of a tree' effect on the tag, and the stencil provided foliage.  I attached a die cut branch from my stash just below the leaves.


 On a piece of white card I stamped a bird and a birdhouse image in blue Versafine ink and embossed them with clear EP.  I then coloured the images with DOs and cut them out.  I attached both the images to the tag, positioning them so that it looked like the bird was sitting in the tree, and the birdhouse was hanging from it.  


 I stamped the word 'Imagine' with Versamark ink onto white card and embossed it with copper EP.  I cut it into a label and edged it with copper pen, then added some dots and lines with a gold pen.  I attached the label to the bottom of the tag, and added some ribbons and fibres to complete the design.  


 I really enjoy creating and decorating tags, they are great fun to do and versatile too.  You can use them as a bookmark, or a piece of home decor, or as a topper on a card!  Also they can be designed to suit any occasion or recipient.
Thank you very much for popping by today, I hope you've enjoyed this post - feel free to leave me a comment, and I hope to see you here again soon  :)


Saturday, 15 December 2018

Fast Florals


Hi and welcome to my blog  :)  I have two quick and easy cards to share with you today; they are both samples from last month's CB shows on tv and are among a fantastic selection of quick cards featured on the CB Design Team blog page 15 minute cards   http://chocolatebaroque.blogspot.com.  I have used two of the new stamps that were launched on those shows - Be Kind and Floral Grunge; black Versafine ink, clear EP, black and silver marker pens, and alcohol marker pens.


I stamped each image onto a piece of CB Luxury Smooth white paper using black ink then embossed them with clear powder.  I then used alcohol pens to colour the images, adding shading and tone.  I used a very pale grey tone to add a shadow line around the flowers to make them pop off the page.  


I used the silver and black marker pens around the edges of each focal panel, then matted and layered each one onto a base card.   I stamped a sentiment in black ink onto each card to complete the designs.  
These cards are not only quick to make but they can easily be copied for batch making.  The sentiments are non specific so these cards are suitable for any occasion and recipient.  Thank you for dropping in today, I hope you've enjoyed this post - I'd love it if you left me a comment.  Feel free to browse my blog for ideas and inspiration or pop back again anytime  :)   

Sunday, 9 December 2018

Autumn Harvest


Hi and welcome to my blog  :)  Today's post is one of my samples from last month's Chocolate Baroque new stamps launch.  I have used the Shared Beauty stamp, and several images from the Wild Meadow set; one of the beautiful new Designer papers from Lesley 'My Floral Soul', Distress Oxide inks, Versamark ink, Copper EP, and Koh-I-Noor paints.  


I took a piece of the Designer paper and cut it to size.  I then stamped and embossed the Shared Beauty image in copper and masked it with masking tissue.  I stamped several images from the Wild Meadow set around the focal image and embossed them in copper too.  I then removed the mask and painted the flower.


I used a copper marker pen around the edges of the focal panel and matted it onto black card.  I took a white base card and stamped several small worker images around the edges of the card to create a border, using colours of DO inks to complement the paper.  I then blended some ink around the outer edges of the card and attached the focal panel.  


I stamped a sentement onto white card and embossed it with the copper EP.  I then die cut it and added ink through the die.  I removed the die and edged the panel with copper pen.  I then matted the panel onto black card and attached it to the card with 3D gel.  


I'm really pleased with this card, it is a colourful, cheerful card that would suit many occasions and recipients.
Thank you for popping in today, I hope this post has inspired you and that you'll visit again soon  :)