Labels

Tuesday, 22 May 2018

Bertie's Honeycombe


Hello and welcome to my blog  :)  This is the second of my CB DT blog posts today, and it was also one of my samples for the CB 'Bee' shows on tv.  I have used stamps from the Honey Bee and Silhouette Grasses sets; Distress Oxide ink - Warm Honey, Yellow Sparkle pen,Versamark ink, white embossing powder, a die, a stencil and some metal embellishments from my stash.


I stamped the honeycombe image onto a panel of Kraft card using Versamark ink and embossed it with white powder.  I used the Sparkle pen to paint the Bee's and white gesso to paint the wings.  


I took a honeycombe stencil and added white gesso through it onto the panel.  I trimmed the bottom edge of the Kraft card to accentuate the cells.  I then added yellow Sparkle pen to a piece of white card slightly bigger than the focal panel and used it to mat the panel onto.  On a spare piece of Kraft card I stamped and embossed a Bee image and the words from the set.  I then cut the Bee out, and cut the words into a panel.   


I took a white base card and stamped the Silhouette Grasses in DO ink repeatedly on both sides.  I then attached the focal panel to the card and added the Bee and sentiment panel using 3D glue gel.  


I took another piece of Kraft card and die cut a large Bee.  I drew around the body on white card and cut it out, then coloured it with the Sparkle pen.  I attached the card to the back of the large Bee then attached that to the card.  


I added a couple of metal embellishments from my stash, which echoed the honeycombe theme of the card.


This is a really simple and fresh design which I think  would suit a variety of occasions, and cards for both men and women.
Thank you for visiting my blog today, I hope that you've enjoyed this post and that you'll drop in again soon  :)  

Make a Wish


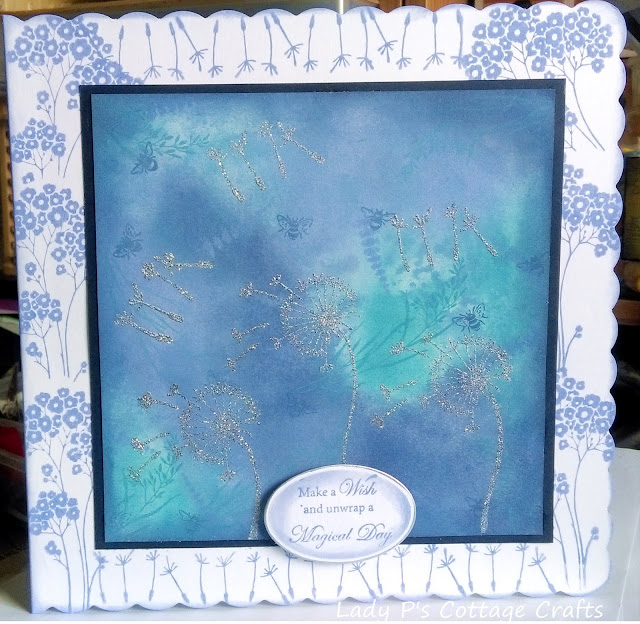
Hi there and a warm welcome to my blog  :)  Today I am sharing a card which is also being featured on the Chocolate Baroque DT blog, as it's my turn again to show a couple of projects.  This card was also on the CB tv 'Bee' shows last month.  For this card I have used stamps from The Rose Tree, Sillhouette Grasses  and Words to Dazzle and Sparkle sets; Distress Oxides, silver sparkle embossing powder, and a die from my stash.


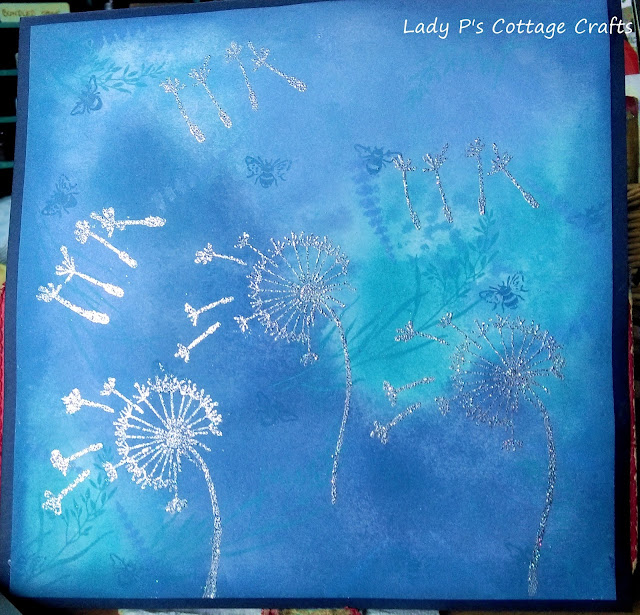
I began with a piece of white card and blended three DOs all over it.  Using the same inks I stamped several worker images randomly over the panel to create the background.  


I stamped several Dandylion images in Versamark ink and embossed them with silver sparkle EP then added some seed images in the same way, positioning them as if they were floating away on the breeze.  


I matted the panel onto navy card.


I took a white base card and using one of the DO inks I stamped a floral group image on both sides and stamped the seed images along the top and bottom edges, creating a lovely border.


I blended some of the ink around the outer edges of the base card.


I stamped a sentiment on a spare piece of white card and die cut it into an oval, adding ink through the die before removing the card.


I'm really pleased with this card, the colours blended together so well and they seem to compliment the stamps well.  This design will suit any recipient and any occasion, a great worker card.
Thank you so much for dropping by today, I hope you've enjoyed this post and will pop in again soon  :)  

Tuesday, 15 May 2018

Just Bee Amazing


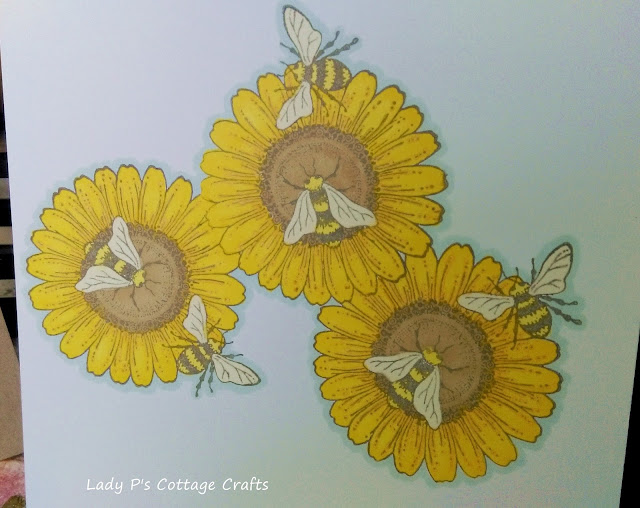
Hi there and welcome to my blog  :)  I have a quick and cheerful card to share with you today which is being featured on the Chocolate Baroque DT Blog - fifteen minute cards.  For this project I have used stamps from the Honey Bee and Mackintosh Words sets; grey Versafine ink, Distress Ink,and alcohol markers to colour with.  


I took a piece of white colouring card and stamped the sunflower image with grey ink.  I then masked it and stamped the image twice more.  I coloured the images with alcohol markers, adding a shadow line around each image with a light blue pen to make the flowers pop off the page. 


I then stamped the Honeycombe image randomly around the flowers, using first and second generation ink, in blue Distress Ink. I then blended the ink around the edges of the focal panel.


On a spare piece of the same card I stamped the sentiment in grey ink.  I used the word 'Bee' from the Honey Bee set and the other words from the Mackintosh Words set. I then cut the words out separately in little plaques, and blended blue ink around the edges.


 This is a quick card to make and the simple design really shows off these beautiful stamps.  There is a cheerful and positive feel to this card, and it would suit a variety of occasions and recipients.
Thank you for visiting my blog today, I hope that you've enjoyed this post - pop in again soon  :)    

Saturday, 12 May 2018

Flying High


Hello and a warm welcome to my blog  :)  I'm sharing another 'blast from the past' with you today.  This is one of my samples from the Chocolate Baroque tv shows back in May last year featuring some of their beautiful butterfly stamps, stencils and masks.  I have used stamps from the Patchwork Butterfly and Words to Dazzle and Sparkle sets; Brusho, Aquatints, grey Versafine ink, Versamark ink, copper embosing powder, copper pen; Kaleidoscope of Butterflies mask/stencil.


I took a piece of white card and stamped the large butterfly image in grey ink and masked it.  I then colour washed the card with blue Aquatint, and sprinkled blue Brusho randomly over the wet paint.  


When everything was dry I removed the masking fluid and used Aquatints to paint the image.  I used the stencil to add some sillhouette butterflies to the background and added some dots with the copper pen.  I then used the pen around the edges of the panel.  


I took a piece of heat resistant acetate and stamped the butterfly using Versamark ink, then embossed it with copper powder before cutting it out.  I then attached it to the painted image by putting glue on the body only,  this leaves the wings free and adds movement.  I matted the panel onto black card.  


I stamped a sentiment in black Versafine ink then attached the focal panel to a blue base card.


I love this butterfly with all it's lovely detail, and this simple design really shows it off.  This is a very useful card suitable for lots of occasions and recipients.
Thank you for dropping by today, I hope you've enjoyed this post.  I'd love it if you left me a comment, and I hope you'll visit again soon  :)  


Wednesday, 9 May 2018

Tip - Toe ....


Hi and welcome to my blog  :)  I have a 'golden oldie' card to share with you today, a sample from last year's Spring tv shows.    I have used stamps from the Spring Bird Tulip and Spring Foliage sets: Brushos, black Versfine ink, Versamark ink,gold embossing powder, a gold pen.


I took a piece of white card and stamped both groups of Tulips from the set, masking and overstamping to create one large group.  When all the Tulips were masked I brushed water onto the card and sprinkled Brushos randomly across the panel.  I love the way the colours burst and spread all over the card creating a beautiful background.  


Using the Brushos as paints this time I painted the flower heads after removing the masking fluid.  


I did the same with the foliage.


I stamped foliage images around the edges of the panel in Versamark ink and embossed them with gold EP, to frame the Tulips.  I stamped and embossed a sentiment in the same way, then added gold pen around the outer edges before matting it onto red card.  I attached the panel to a white base card and blended DI around the edges.   


I love this design, I think it's really bright and cheerful and very Spring-like.  I think it would make a lovely card for a Spring birthday, anniversary, get well or any other occasion.  I also think it is suitable for both male and female cards.  
Thank you  very much for popping in today, I hope you've enjoyed this post and will come back again soon  :)    


Tuesday, 8 May 2018

Living the Dream


Hello and welcome to my blog  :)   I have another of my 'Eastern' samples to share with you all today.  For this card I have used stamps from the Serenity and Artistic Affirmations sets; gold Soft Form Relief Paste, watercolour pens, Distress Inks, printed handmade paper, gems and a die from my stash. 


The first thing I did was to spread the gold Soft Form paste over the archway part of the stamp only and set it aside to dry.  It's best to leave the paste overnight as it needs to be completely dry before you peel it off the stamp.  I love using this paste in the way because it picks up all the beautiful fine details from the stamps.  I also used the paste on one of the sentiment stamps and let it dry.  When they were both dry I peeled them off the stamps and trimmed them with scissors.     


I stamped the same image onto white colouring card with grey ink.  I then coloured the image with watercolour pens and die cut it into a tag.  I added gold pen to the edges of the tag. 


I took a spare piece of card and die cut it into a label.  I added ink through the die and gold pen around the outer edges. Then I cut a piece of handmade paper to size.  


I matted the paper onto gold mirror card then attached it to a white basecard.  I added some tiny gems around the top of the tag then attached the golden arch to it.  


I added some larger gems to the lilly and a couple more tiny ones to the bottom af the tag.


I then took the gold sentiment and attached it to the die cut label.  I put a shadow around the words with a grey pen and added some more gems.  I then attached the label to the card.


I absolutely loved creating this card, I think this is one of my favourite stamps from these sets.  This was only my second time of using the Soft Form paste and I really love that too!  
Thank you for visiting my blog today, I hope that you've enjoyed this post - pop in anytime for a browse  :)

Monday, 7 May 2018

Roses are Red


Hello there and a warm welcome to my blog  :)  I have another of my samples to share with you today, from the Chocolate Baroque tv shows in April.  I have used stamps from the Rose Tree and Amazing Mackintosh Words sets; Pearlescent paints, gold embossing powder, Versamark ink, gold pen.


On a piece of black card I stamped and embossed the tree image in gold, then coloured it with pearlescent paints.  I love these paints - they give my work a beautiful sheen.


 Next I took some spare black card and stamped and embossed a couple of butterflies and the ladybird in gold, then cut them out.  I painted them as before.


I matted the focal panel onto gold mirror card and attached it to a white base card, then I added the butterflies and ladybird with 3D gel glue.  


On some more spare black card I stamped a sentiment from the Amazing Mackintosh Words set and embossed it in gold.  I cut the sentiment into two small panels and added gold pen around the edges.


I'm really pleased with this card, it's a simple but elegant design that could be used for a variety of occasions.
Thank you for dropping by today, I hope you've enjoyed your visit and will pop in again soon  :)